Tuesday, December 16, 2014

Techie Tuesday: Improve Your Images with Three Free Resources

You don’t know what you have. 

This phrase is usually mentioned in regards to someone being ungrateful. However, from working with bloggers, I’ve discovered that most bloggers aren’t using all the tools they can, and opting to pay for tools they necessarily don’t need. Today, I wanted to share some of my favorite free resources for photo composition and editing.

One of the most common questions I get from bloggers is, “should I buy photoshop”? My answer is no in most cases. The only real exception would be if you have a photography blog.


Product Collages - Canva: Bloggers can spend a lot of time finding the perfect images and products for collages. Canva is great because you can include any images/products that you want. It also provides some built in templates and graphics that you can customize. Any graphics or illustrations that you want to arrange for your blog, social media profiles, or promotions, you can definitely do in Canva.


Photo Editing - iPhoto: You can only do so much with a photograph if it was taken on a bad camera. I suggest that people opt to purchase a good camera and lens, instead of Photoshop. By using a high-quality camera, you will have to do less photo editing. With iPhoto, you can crop and resize images quite easily, adjust the photo filters and lighting (with moderation). iPhoto allows you to bulk-export images to the sizes and specs you need (tutorial I wrote for on White Oak). You can read more iPhoto tutorials here.


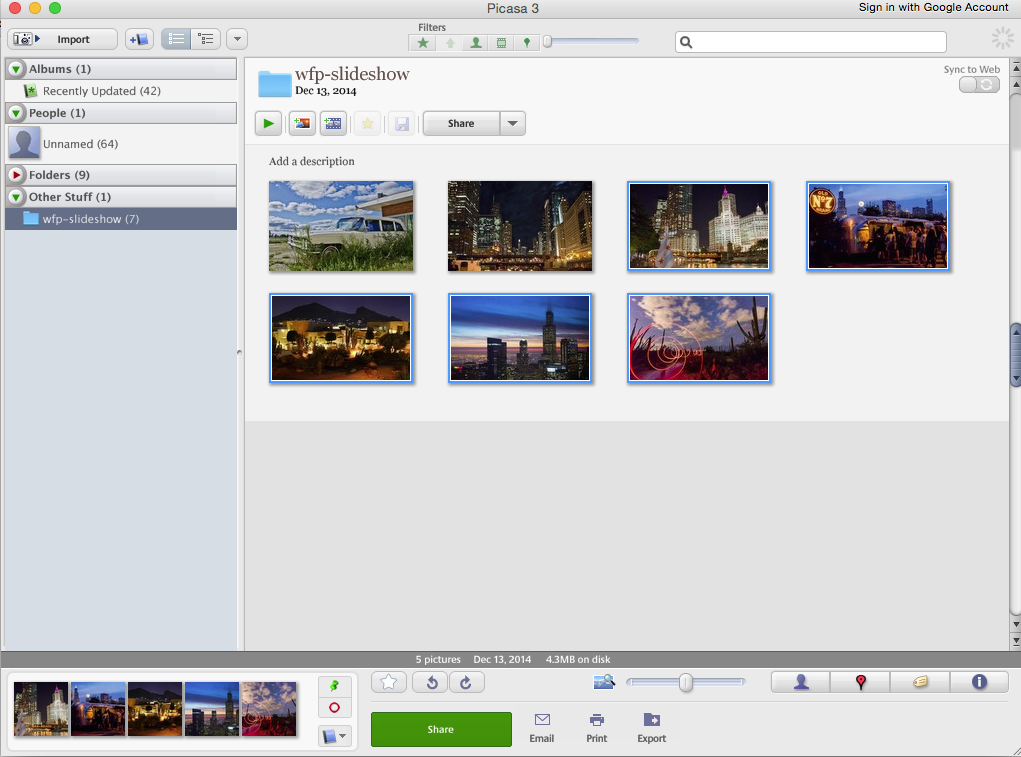
Photo Collages - Picasa: Picasa is through Google. It allows you to organize, store, and edit your photos. It is not as smooth as iPhoto, but it works very well to put together photo collages - i.e. two vertical photos together, etc. If photo editing and collages are not that intuitive to you, I would recommend going through the tutorials that each piece of software provides. You can also view youtube videos online.

If you have specific questions about any of these products or a question for “Techie Tuesday”, either leave a comment below or you can write me at hello (a) whiteoakcreative (dot) com.

Wednesday, December 3, 2014

Iowa Blogger's Holiday Party


We are so excited to host a Midwest Bloggers holiday soirée in Iowa to catch up, meet new friends, network and celebrate this jolly time of the year. We'd love to invite you to sip, chat and be glam at Penelopie Beauty Bar on Friday, December 12th from 7-10pm. Penelopie Beauty Bar will be offering complimentary makeup demos and snacks and drinks will be provides. To give back, please bring an unwrapped toy for Toys For Tots to enter to win a free blowout. Please RSVP back to KatalinaGirlBlog@gmail.com by Friday so we can figure out how much food and drink is need.  We hope to see you all there. 

Tuesday, November 18, 2014

Techie Tuesday: WordPress Categories

Today’s question is from Hillary of Style in a Small Town: I use WordPress and am starting to develop several different categories of blog posts. I'd like to have a "Styled" page just for my outfit posts and a "Beauty" page, for my beauty posts, etc. How do I do this? I've seen where other bloggers have those pages to click on and at the top of the page is says something about "these posts are labeled x". Can you help me with this?! 

In order to have pages dedicated just to certain types of post, you need to make sure you are categorizing them accordingly. In WordPress, you can assign keywords to posts using both Categories and Tags. I recommend that bloggers use categories for series and larger ideas, and use tag for post specific content. You should have no more than 30 categories. For my White Oak Creative website, I have four categories - Client Work, Font Friday, Tutorials, and Company Updates. Just because I say you should have no more than 30 categories means that you should have a ton. Categories should be focused on the content you regularly post.

Here’s two examples:

  • Fashion Blogger - Jennie Wold - features outfits and styling tips. 
    • Categories (6): Spring, Summer, Fall, Winter, Styling Tips, and Personal* 
    • Tags (unlimited): Brands and trends she featured in those specific posts, i.e. “midi-skirt, Asos, etc). 
  •  Food Blogger - Cookin Cowgirl - features recipes and diy food projects 
    • Categories: Separated by meal component as well as holidays (over 30) i.e. See Recipe Box and Other 
    • Tags (unlimited): related to the ingredients incorporated i.e. corn, flour, brown sugar, etc.    
Often when I do a redesign, clients go through their content and clean it up. This isn’t ideal. If you are producing deliberate, purposeful content, you should have a clear idea of your entire site’s organization. Whether or not getting a redesign, I suggest going through your posts and cleaning up your tags and categories. If your categories are in pretty bleak shape (assess this by going to ALL POSTS < CATEGORIES in your site’s DASHBOARD), create an outline of your post content.

When creating categories, you want to make sure you have at least 5 posts per category. The only exception is new bloggers or new series that you are starting. I’ve had clients create a category outline to realize that only 1 or 2 posts would fall into those categories. Then, it’s truly not a category. Also remember, you can always add categories.

After you've created your category outline, you can delete any categories you are not going to use. To do this go into your site’s CATEGORY PAGE. Delete categories you are not going to use (this will just delete the label from the post). If you are adding any categories. Add them here.

Once you’ve got all your categories listed, view ALL POSTS in your DASHBOARD. Hover over the post you would like to edit and select “QUICK EDIT”. Check the CATEGORIES you would like to assign to the post and add in the tags you would like to add (separate with a comma). Check UPDATE and repeat for all posts.

After all your posts have been properly categorized go to APPEARANCE < MENUS. In the left toggle of the page you will see an area with “Pages, Links, Categories” toggle. Select CATEGORIES. Select the categories you would like to add to the MENU. Then drag and drop them to where you would like to see them in the menu. When finished, press “SAVE MENU” to save changes.

Do you have tech or design questions you would like answered? "Techie Tuesdays" is a weekly series written by Lindsay HumesofWhite Oak Creative. In order to make this series as beneficial to Midwest Bloggers, you can email your specific questions to Lindsay at hello@whiteoakcreative.com, and she will answer them in her weekly series.

Friday, November 14, 2014

FRIDAY FAVORITES LINK UP, V35


Hello! We are Kaitlyn & Lisa, sisters (in-law) who share everything from relatives to clothes. We blog about everything from lifestyle inspiration to fashion and home décor, recipes events and more (and we promise to keep the rhyming to a minimum!) We most enjoy our “rock & swap” posts because that idea of swapping clothes with a friend and making something new again is where our business began (We own two websites: Because I Shop Too Much, bistm.com and Because They Grow Too Fast, btgtf.com). Over the past two years, our blog has become our second “home,” a place to share all the moments we experience together. We look forward to all the future readers who will take a peek into our lives (and closets).


101 Things I love: Johanna is not only a good friend but a great Mom who sets the standard for us women who aim to "have it all." The theme of her blog allows a wide range of content so we always look forward to what she will surprise us with next whether it's a fashion post revolving around wide leg trousers (one of her 101 favorite things) or her top beauty picks. 
What Would V Wear: We first started interacting with Vanessa through Instagram because she is extremely diligent and generous with her daily comments, always making us smile! Since then, we have become big fans of her blog, as her style is bright and fun yet always polished and on point. You can definitely tell this girl graduated with a fashion degree ;)

Lake Shore Lady: We love the perfect combination of stye inspiration and tasty recipes Lauren shares - In both categories, the content is both approachable and heartfelt. Most recently, she featured her own (healthy version) of a pumpkin spice syrup which was a great alternative to the Starbucks version and we just couldn't pin it fast enough :) Not to mention, she is so easy to talk to! 

Stylish & Scatterbrained: Megan is one of those girls that you just want to be friends with - She is very honest with her writing by sharing personal life moments in the hopes of helping her readers which is just one thing that makes her relatable and a source of inspiration. Additionally, she can flawlessly pull off menswear just as easily as floor length florals so we always look forward to her style posts. 

Make sure to link up below!

Thursday, November 13, 2014

Aftcra Handmade Goods | 4 Ways

We consider bloggers makers. We love creating for our audiences, dreaming up new ideas for outfits, recipes & parties, and growing our blog brands. So, we are fully supportive of the community of makers & independent artists that make up Aftcra! Aftcra is an online marketplace for unique handmade goods, crafted by American hands.
 
Each of us styled a piece from Aftcra in our homes. It makes you smile knowing that you're helping support an artist, who's out their trying to make an impact- just like we are!
 
 
Aftcra Pieces | 4 Ways
 
Another thing we love about Aftcra? They're also headquartered in the Midwest! On their website they  sell everything from home décor to papergoods to jewelry & clothes! Be sure to stop and shop in their online store when you're looking for one of a kind pieces for friends and family this holiday season!
 
Are you planning on buying handmade gifts this year?

Friday, November 7, 2014

FRIDAY FAVORITES LINK UP, V34


Happy Friday y'all! I'm Annica and I blog at Life Modifier, a lifestyle blog for those who enjoy living by their own rules and have a passion for life. I love running and healthy eating but also believe in the balance of eating the "bad" things you love. Chips, salsa, and a glass of red wine are my go-to meal. 

My blog was born in Missouri, but I recently moved to Denver which definitely lacks the midwest charm that I miss so much. Hopefully life will bring me back soon. In the real world, I'm a marketing professional for a utility company. It may not be the most glamorous industry, but every day is new and exciting. 

 When I'm not blogging, trying to meet new people in a new city, traveling back to Missouri or drinking a glass of vino, I'm usually catching up on a few of my favorite midwest blogs.

The Newlywed Notebook(http://thenewlywednotebook.com): Lindsay's blog is one of my favorites to read because she is so real and open about her life and her marriage. There's no fluff and I love that about her blog and her! 

Style In A Small Town(http://www.styleinasmalltown.com): Having moved from a small town in Missouri, I can totally appreciate Hillary's love for fashion on a budget. Her outfits are affordable, adorable and always achievable! 

Eeny Meeny Miny Morgan(http://eenymeenyminymorgan.blogspot.com): Morgan might be one of the most fashionable Missouri girls! I love how spunky her style is and she makes me what to try mixing prints and patterns and new styles that I would have never considered. 

Watcha Makin' Now?(http://whatchamakinnow.blogspot.com): I love to cook, I love looking at photos of food, but more than both of those I love to eat. Chelsea has some amazing recipes and some food photos that will leave you drooling on your desk! 

Make sure to link up below!

Monday, November 3, 2014

One Piece | 4 Ways: With Grace & Gold

We're so excited to share a one piece, four ways post featuring prints from the shop of the beautiful new branding company & print shop, With Grace and Gold. We each styled a print from their new print collection in our homes. We love the special little touch that each adds and are an affordable way to update your décor.
 
 
One Piece: 4 Ways | With Grace & Gold
 
 
With Grace & Gold was started by two Midwest Bloggers, Kelly and Andra, and we love their inspiring story!  Be on the lookout for a Behind the Brand story from them coming soon.

Friday, October 31, 2014

FRIDAY FAVORITES LINK UP, V33


Hello everyone, my name is Emily. I’m a fashion designer by trade from Chicago, who loves shoes, chocolate, animals, and all things girly.  My blog’s name is Baily Lamb                            
There is an interesting story behind my blog’s name. Since I am intrigued by numerology, I knew that the name I chose had to have a deeper meaning. This meant that all the letters of the name had to add up to number 24, and the name had to start with a letter B.  After spending long hours of putting together different letters next to each other, that added up to 24, it was almost impossible to come up with a name. But I was not going to give up, until it finally came together this last summer. After two long years of searching for the perfect name there it was “Baily Lamb”                  
The reason I started this blog was to inspire women to try to look their best, by giving them many different ideas for fun and stylish outfits. In addition, I also believe that women’s looks definitely determines their confidence and outlook on life. So, at the end of the day my ultimate goal with this blog was to empower women to look and feel great, and live their lives happy and confidently through fashion.


Other fellow bloggers that I currently love
Maya from Charmingly Styled. I love her elegant and sophisticated layout of her template. You can tell that she has a clear understanding of blogging as a business, and she treats it as such by having a professional looking site that is easy to navigate. If you want inspiration of what a successful blog should look like you have to check out Charmingly Styled. In addition to the beautiful layout her style and fashion choices are amazing very classically chic.
Livia from Love Always Liv. I discovered Livia just recently through social media and I fell in love with her style instantly. I must admit I stalked her around for a bit on Instagram, because I just couldn’t get enough of her style and then when I discovered her blog, I stayed on there forever reading through all her posts. There is something about her style of writing that is really addicting and soothing at the same time. You can just tell that she is a very positive, uplifting, and sweet person; it just comes across in her writing, and everyone needs a little positivity in their life. So, go and check out her blog I promise you, you will not regret it. 
Ema from Elle Sera Belle. This blog caught my eye right away because of its beautiful photography.  Blogging is all about creating beautiful content, and Ema does an amazing job at doing so with the professional looking photos. Also, I love her blog because it covers a variety of topics, it’s like a one stop shop for me. I get to see beautiful fashion ideas, learn some great recipes, and DIY projects. This Blog has it going on, definitely one of my favorites.

Caryllee from More Pieces of Me I just LOVE Caryllee’s style, she has the most versatile style I have seen so far. She has dressy outfit ideas for going out, casually chic for just lounging around, and very classy work appropriate ones. I also noticed how well she mixes different prints and textures together. Some of the outfits I loved were: striped shirt with leopard handbag, tartan scarf with leopard shoes, and leather skirt with denim shirts. She really has one of the best creative styling ideas. I am a huge fan of her blog and you should check it out as well, because she will give you so many different ideas how to style items that you could have never imagined being paired together. 

Happy Halloween!

Thursday, October 30, 2014

Social Media With Style

Today we have a guest post from one of our co-founders, Lauren, of La Petite Fashionista ! She's launching a second session of her Social Media With Style Workshop & has a discount for Midwest Bloggers. Take it away, Lauren!

When I started blogging back in 2007, I had no idea the blogging community would grow to be as large as it is. When I moved to Wisconsin & helped to start up Midwest Bloggers, I was surprised & excited yet again when our group grew to over 500 people. Blogging has seriously changed my life & brought so many wonderful people & opportunities into it!

I'm so thrilled to share that I'll be starting the second round of the Social Media With Style Workshop! The first one was better than I could have even imagined and connected me with so many inspiring bloggers. We just opened up sign-ups & you can save 10% off the course with code MWBloggers for our  workshop starting on November 10th!
 
Social Media With Style Workshop - to help bloggers develop substance, style & strategy for their social media presence!
 
One of my favorite parts was being able to ask/answer questions and see all of the projects everyone was working on in our private Facebook group. It was like having a built in support group of blogging friends! The best part is the group remains active long after the workshop- so it's a perfect, non-judgmental environment to ask questions, share articles & gain feedback.
 
In our 4 week workshop we cover everything ranging from:
  • creating a branding guide & mission statement
  • designing an editorial calendar
  • Facebook, Twitter, Instagram & Pinterest analytics
  • how to use those analytics to optimize your blog content
  • content scheduling resources to make life easier
  • building a media kit
  • brand partnerships & blog monetization
Each week a PDF gets sent to your inbox & becomes available in a password protected section of our website to read on your iPad/computer or print. Additionally there are worksheets to help you apply each section's learnings to your blog & social media presence.
 
Social Media With Style Workshop: a Workshop for Bloggers

Teaching people about social media & helping them grow their audience truly feels like my calling. I love being able to put all of my years of experience blogging on La Petite Fashionista to work!
 
Check out the entire course outline here & read the testimonials from our workshop alumni here! If you have any questions about the workshop feel free to send me an email. This course is perfect for anyone who's fairly new to blogging &  ready to take things to the next level or a small business trying to step up your social media game!
 
Don't you can get 10% off the course with code MWBloggers when they sign up for the Social Media With Style Workshop!
 
xoxo, lauren

Tuesday, October 28, 2014

Adding Mailchimp Signup to Your Blog!

Today's question comes from Maya McDonald of Charmingly Styled.

"How do I setup a Mailchimp form to my blog?"

There's several different ways to add a Mailchimp signup for to your blog. To do a pop window or include a signup form within your widget or footer and do it well requires a significant amount of code and css knowledge. Most third-party plugins, even the MailChimp plugin, often don't fit with the overall look and feel of the site. This option is the simplest way to add it to your site.

To setup mailchimp to your blog, you will need the following:
1. Mailchimp Account
2. Header Image
3. Knowledge of the fonts and colors used on your site (you can view last week's post for info on how to get this info).


1. Sign on to your mailchimp account. Go to LISTS. Select CREATE LIST on the top right corner of the browser.


2) List details: Your list name, from email, and from name are all visible to someone who signs up. For Maya's example, we used the following:

List Name: Charmingly Styled Monthly Newsletter
From Email: Charminglystyled@gmail.com
From Name: Maya McDonald
Reminder: You signed up for this newsletter at charminglystyled.com

For notifications, select how you would prefer either daily summary or one-by-one. It's all up to personal preference. Once you've entered all the information. Save

3) You will come back to your list dashboard. Select your new list.

4) Select SIGNUP FORMS. You have the option of choosing from three different forms. The easiest and most accessible form to use is the GENERAL FORM.


5) By dragging and dropping and using the DESIGN IT feature, you can customize your sign up form. This is where you enter your header. Customize how you would like your form to look. You can make edits later!

6) Copy the SIGNUP FORM URL


7) Now go to the dashboard of your site, we are going to the link in the newsletter in the navigation of your site!


BLOGGER: In your dashboard, go to LAYOUT.

If you use PAGES WIDGET for your menu bar...

1) Select EDIT in the PAGES widget box.


2) A new window will pop up, select ADD EXTERNAL LINK.


3) Another window will pop up, for page title, put the title you would like the link to have. I used "Charmingly Styled Newsletter". For the link, place the link you copied. Click Saved. The link will now be visible.


If for some reason, your designer used HTML widget area for your menu bar (like Maya's Designer), you will need to follow the same structure of the links. The structure follows this order:

<li><a href='SIGNUP FORM URL'>TITLE OF LINK</a></li>
So I replaced that info wit the URL of the form and the title.
<li><a href='http://eepurl.com/ZRReD'>NEWSLETTER</a></li>


WORDPRESS:
1) In your dashboard, select MENUS under APPEARANCE

2) Select LINKS from the toggle menu. Copy in your MAILCHIMP FORM URL and your Link Text should be how you would like the text displayed on your menu bar. Select Add to Menu.


3) The link will automatically show up on the bottom of your Menu Structure. Drag and drop it to where you would like it to be in your menu. Select SAVE MENU, the link should now be visible.


Do you have tech or design questions you would like answered? "Techie Tuesdays" is a weekly series written by Lindsay Humes of White Oak Creative. In order to make this series as beneficial to Midwest Bloggers, you can email your specific questions to Lindsay at hello@whiteoakcreative.com, and she will answer them in her weekly series.

Friday, October 24, 2014

FRIDAY FAVORITES LINK UP, V32


Hi, guys! It’s nice to meet you all. I’m Natalie, the girl behind the life + style blog, CincinNatalie. I blog about everything from fashion, food and DIY, to my favorite places around Cincinnati. If you haven’t been to Cincinnati, then I’m officially inviting you. Our restaurants? They’re pretty great. If you’re a Diners, Drive-ins and Dives fan, you’ll know why.  And if not? Just go with me on this one.

I’m a public relations professional by day, and aspiring blogger everywhere in between. Blogging pushes me to challenge myself, try new styles and experiment with patterns. Wearing a sequin maxi skirt and chambray top for an outfit post is just plain fun. Because whoever said “all dressed up with nowhere to go” obviously didn’t have a blog. And guys, I have to admit - my ability to walk in heels has improved tremendously. A major win in my book.


And speaking of "winning," I want to give a major shout out to some fellow Midwest bloggers. They are seriously awesome, and their unique styles provide me with daily doses of inspiration.

1. Out + Outfit: Katie is a fellow Cincinnati blogger whose style can't be beat. She looks absolutely gorgeous in this all-black ensemble

2. Project Soiree:I spotted Sara's shoes on Instagram and fell in love immediately. If one thing's for sure, it's this: she's got it together.

3. My Inner Fabulous:Catherine can wear anything flawlessly, from flannel and scarves to pretty, full skirts. Also, her apartment is adorable. 

4. Hunt + Harvest:Olivia rocks leather like there's no tomorrow. She's fierce, super cool and bakes like a pro. Seriously, can we talk about these samoa pretzel bites? Drool.

Thanks for stopping by! Give your fellow bloggers some love and link up below to your favorite post of the week.


Thursday, October 23, 2014

One Piece | Four Ways: Love, Blackbird Boutique

Here at Midwest Bloggers, we love supporting and highlighting small businesses like Love, Blackbird Boutique. Especially when one offers such adorable and stylish pieces at affordable prices. Each founder selected an item to style from Love, Blackbird Boutique and put their own spin on it! 


 Samantha: Navy Dress | Maya: Pink Bubble Necklace
Katelyn: The Cara Romper | Lauren: Piko Top - Army

We've also teamed up with Love, Blackbird Boutique to offer you a discount - simply use MIDWEST20 and you will always get 20% off your order! 

Tuesday, October 21, 2014

Techie Tuesday: Developer Tools

I haven't covered this issue yet on Techie Tuesday's, but I've gotten a lot of questions in which this preliminary information is needed, so I thought I would outline it. You can use developer tools to extract information about your site. Today we are going to focus on a very basic and small element of it - finding the colors and fonts used on your site. We will also use it to see how you can test your website on multiple devices within your browser

1. Go to View < Developer < Developer Tools. A window will appear at either the bottom or right side of your browser. This window shows you the code used to run this website.

2. At the top-left corner of this new window, you will see a magnifying class. select it.


3. Now hover over elements of your mouse. As you hover over them, they will highlight. In the Developer Tool Window, you will see "style" information change and update.


4. You can now find out the specific fonts and colors of your site by hover over the elements. In the style dashboard, you will see the same format - "color: #number" or "font-family: "font name"" 


Here's the example - Finding the exact hex color for the pink background of Charmingly Styled's Site - #ffe7ee. See if you can find it on your own! 


 There's a few things I want to note here:
+ This can get very confusing depending on how much you know with code and how your designer developed your site. The element you are highlighting should have the same color and font as you see in CSS window, if not scroll up or down.
+ You will also see elements with lines struck through them. This means that in the CSS stylesheet a subsequent style overruled what is struck out.


 VIEWING BLOG ON MULTIPLE PLATFORMS: This method does not work if you have the responsive functionality disabled from your blogger site. I'm using 312Beauty as an example.

1. Next to the magnify class, you will see a smartphone looking icon. Click it.

2. For "Device" select the device you'd like to view your site on.

3. You can use the swap icon to switch views from horizontal and vertical layout.


 If your site looks messed up on a mobile version (i.e. cell phones), check it with your phone. If it is messed up on  your phone, in most cases, you can assume it is messed up on a majority of smart phones. To fix it, you have a few quick (and free options), by enabling Blogger or WordPress versions or use a third-party plugin to make it responsive. I believe that these are short terms solutions. With these solutions, one loses his/her individual branding of the site, and it is not the most curated experience. As more and more blog readers are coming from mobile, this might be a big reason you want to address. 

 Firefox has a similar developer tool, but Safari does not.


To read more about developer tools, I recommend these links: Developer Tools Tutorial from Google Chrome // Youtube Video for the Visual/Experiential Learners // HTML5 Rocks


Do you have tech or design questions you would like answered? "Techie Tuesdays" is a weekly series written by Lindsay Humes of White Oak Creative. In order to make this series as beneficial to Midwest Bloggers, you can email your specific questions to Lindsay at hello@whiteoakcreative.com, and she will answer them in her weekly series.

Friday, October 17, 2014

FRIDAY FAVORITES LINK UP, V31


Hi! I am Ana and I have blog called Mrs. American Made  I love clothes and accessories, and one of my favorite places is my closet of wonderful things. Some days I try on many outfits and I plan them from head to toe. Some days I just throw on something that I already know works. I feel like I am not easy to dress because I am petite at 5’3” and “curvy” but I have slowly accepted those facts and figured out some things about what to wear. I am not a model. I am not a super-duper high-end fashionista. I am just a mom trying to look cute on an everyday basis.


In 2006, my husband and I and our two (now teenaged) children moved from Miami to Boulder, Colorado, and our lives changed in many ways. We started becoming more aware of the environment, we started eating more carefully, we started caring about sustainability. As a natural progression “Made in USA” products became important to me. It turns out that only 2% of the clothing sold here is made here. In 1960, 95% of clothing sold in the United States was made in the United States. And it turns out that if consumers spent just an extra 1% on U.S. goods, it would create 200,000 jobs. 

So I have decided to commit to wearing more “Made in USA” outfits and I post photos of them on my blog http://www.mrsamericanmade.com

I'd also love for you to keep up with me on FacebookTwitterPinterest and on instagram


 I was looking for examples on how to style my new plaid flannel shirt and I thought these four were great examples. La Petite Fashionista does a classic look in a new color scheme with the pop of hot pink hat and lipstick; The Kissing booth layers it under a jacket but tones down the plaid with girly ruffles and movie star shades; Pretty & Fun has no embellishment - a classic like this needs none - and I love the ice cream!; And Lily Love Affair glams up the plaid with the trendy hat, cool shades and a great cardigan. Now I have some great options for mine! 

Make sure to link up below! 

Thursday, October 16, 2014

One Piece | 4 Ways: Knee High Socks

This time of year we love a look that's cozy & chic. We love the look of skirts & dresses paired with tall boots. A pair of knee high socks are the perfect finishing touch to a fall ensemble. We've teamed up with Chrissy's Knee High Socks to show off 4 ways to style a pair of knee high socks in perfect autumn style.
 
We're also teaming up with Chrissy's Knee High Socks for a $50 gift certificate so you can stock up on cozy chic socks this fall too!


One Piece | 4 Ways: Chrissy's Knee High Socks
 
We're each styling a pair of knee high socks (Samantha, Maya & Katelyn in the graphite thigh highs & Lauren in the thick maroon socks). The key to pulling this look off is to pair with a knee high boot for the perfect pop of color- and choosing a sock in a complementary shade to your outfit. We're absolutely obsessed with this trend for fall!
 
Want to win a $50 gift certificate to Chrissy's Knee High Socks? Enter our giveaway below:

 
We can't wait to see how you'll style your socks!
 

Tuesday, October 7, 2014

Techie Tuesday: Setting Your Gravatar

Today's question comes from Christina Solomon of Chritiques, "How do I upload a gravatar image to my wordpress profile?"

Before I begin, I want to note two things. One, this is not as intuitive as one would think; and two, even though most blog sites have trended to using DISQUS for comment management, there are still a good portion of WordPress blogs that don't.

Even if you don't have a wordpress blog, you can have a WordPress username which I would recommend. If you setup a wordpress username with a profile picture, whenever you leave a comment on a wordpress blog, your profile picture will be visible.

To sign up for a WordPress username, simply complete this form.

Also, I should note that the Gravatar is the little profile picture - it is seen at the top right of your dashboard, on any comments you leave and on your subscribe emails. I've included a few examples from Megan Jedlinski's blog Stylish & Scatterbrained.
 An example from the comments. 
 Example of the Dashboard


Example from emails people receive when they subscribe to get posts in their email.

1. Register your wordpress account with Gravatar: https://en.gravatar.com. You want to make sure that the email that is associated with your blog is listed with Gravatar.

2. After you've registered your account and added a picture, you need to make sure that your own blog is listed under "my websites". To do this, you need to go to the Gravatar Dashboard and select websites. If your website is not there, add it. Within 10-15 minutes, your picture should be showing up.

Do you have tech or design questions you would like answered? "Techie Tuesdays" is a weekly series written by Lindsay Humes of White Oak Creative. In order to make this series as beneficial to Midwest Bloggers, you can email your specific questions to Lindsay at hello@whiteoakcreative.com, and she will answer them in her weekly series.

Tuesday, September 30, 2014

Techie Tuesday: Centering Third-Party Media Ads

Today’s question comes for Audrey of Audrey Salutes, “how do I center my third-party media ads in my widget?”  

Third-party media ads are ads you would use from Rewardstyle, Glam or Blogher. Most bloggers express a lot of frustration when trying to set them up. Ads. Often, everything in the sidebar will be centered besides it.

First, you want to make sure you’ve selected an ad that fits your widget sidebar. Most sidebars fit ads that are 300x200px or 160x60px. Pixel height of your ad doesn’t matter as much as width. You don’t want to put an ad that is wider than your sidebar. I should note: if your blog is not built responsively to images and videos, you are going to have a bad time, especially for mobile and tablet versions. You are making these edits in the following areas. If you have WordPress, Appearances < Widgets  (see image below for reference). If you have blogger, in the html/javascript gadgets of Layout in the dashboard.

Most bloggers try to use this method to center their ad:
<center>
AD CODE
</center> 

While it is accurate, it is not the best practice. Your ad is interactive and functioning feature. It needs to be placed in a <div>. This option works most of the time:
<div style="text-align: center;">
AD CODE
</div>


Occasionally, ads can be extremely strange and center some of the time. One way to prevent is this is to assign a "display:block" to your <div>. Thus, you would have:
<div style="display: block; text-align: center;">
AD CODE
</div>

What is “display: block”? Without getting too complicated, assigning a block level display to an element (your ad) means that the browser will display line breaks before and after the . The will take up the full-width of the available space, and the elements in it with be now centered. If you want to align your elements left or right, simply replace “center” with either/or.

Do you have tech or design questions you would like answered? "Techie Tuesdays" is a weekly series written by Lindsay Humes of White Oak Creative. In order to make this series as beneficial to Midwest Bloggers, you can email your specific questions to Lindsay at hello@whiteoakcreative.com, and she will answer them in her weekly series.